Smart home security has become essential, and the ability to monitor your security devices on a larger screen, such as a Windows PC, adds an extra layer of convenience and flexibility. While Yoosee is primarily known as a mobile app for managing IP cameras and smart devices, many users prefer accessing their surveillance feeds on a Windows PC for better visibility, enhanced control, and multitasking capabilities.
This comprehensive guide will walk you through everything you need to know about using Yoosee on a Windows PC, including how to download, install, and effectively use the app. Additionally, we’ll explore alternative methods and provide troubleshooting tips for a smooth experience.
Why Use Yoosee on Windows PC?
Yoosee’s mobile app is popular for its remote monitoring capabilities, but using it on a PC offers several distinct advantages:
a. Larger Display for Enhanced Viewing
Watching surveillance footage on a larger screen allows for more detailed monitoring. This is especially useful for businesses or homes with multiple cameras, where split-screen views provide better situational awareness.
b. Efficient Multitasking
Using Yoosee on a PC enables users to monitor their security feeds while working on other tasks. You can easily switch between windows, making it a practical solution for office settings.
c. Keyboard and Mouse Control
Navigating the Yoosee interface with a keyboard and mouse can be faster and more efficient than using touch controls on a mobile device. This setup is particularly beneficial when managing multiple cameras or reviewing extensive video footage.
d. Better Performance and Stability
PCs generally offer more processing power and stable internet connections, reducing the likelihood of app crashes, lag, or buffering issues during video playback.
Methods to Use Yoosee on Windows
Currently, Yoosee does not offer a dedicated desktop application for Windows, but there are effective ways to access it on your PC:
#1 Using an Android Emulator
An Android emulator allows you to run the Yoosee mobile app on your Windows PC by creating a virtual Android environment. Popular emulators include BlueStacks, NoxPlayer, and LDPlayer.
Steps to Install Yoosee via BlueStacks:
Download and Install BlueStacks
Visit the official BlueStacks website and download the emulator.
Follow the on-screen instructions to install it on your PC.
Set Up BlueStacks
Open BlueStacks after installation.
Log in with your Google account to access the Google Play Store.
Download the Yoosee App
Open the Play Store within BlueStacks.
Search for “Yoosee” and click on the “Install” button.
Wait for the installation to complete.
Launch Yoosee
Once installed, open the Yoosee app from the BlueStacks home screen.
Log in or create a new account to start monitoring your devices.
#2 Using Yoosee Web Access (If Available)
Some IP camera systems offer web-based access through a browser interface. While Yoosee does not officially support direct web access, certain models may provide local network access via an IP address. Check your device’s manual for instructions on enabling browser access.
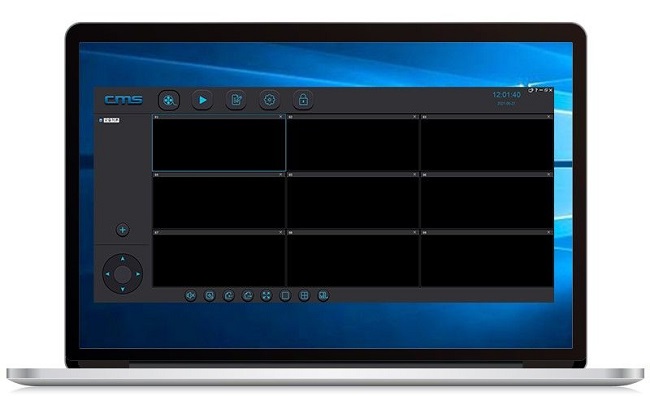
#3 Using Yoosee with CMS Client Software
Some Yoosee-compatible cameras support CMS (Camera Management System) software, which allows for centralized monitoring on a PC without an emulator. Here’s how to use it:
a. Download CMS Software
Visit the manufacturer’s website for your IP camera model to find the CMS software compatible with Yoosee cameras.
b. Install the CMS Client
Download the software and follow the installation instructions.
Launch the CMS client after installation.
c. Add Your Camera to the CMS
Log in to the CMS software.
Add a new device by entering the camera’s UID (Unique ID), username, and password.
Ensure the camera is connected to the same network as your PC.
d. Start Monitoring
Once configured, the CMS client will display live video feeds, allowing for real-time monitoring, recording, and playback.
Features and Benefits of Using Yoosee on PC
Using Yoosee on a Windows PC provides access to all the essential features available on mobile, with added convenience:
a. High-Resolution Video Feeds
PCs can handle higher resolution streams more efficiently, ensuring smoother playback and better visual quality.
b. Multi-Camera Viewing
Simultaneously monitor multiple camera feeds on a single screen without switching between devices.
c. Advanced Video Playback
Easily navigate through recorded footage with precise control over playback speed and timestamps.
d. File Export and Backup
Save recorded video clips directly to your PC’s hard drive for offline review or backup purposes.
Troubleshooting Common Issues
a. BlueStacks Performance Issues
Lagging or Slow Performance: Ensure your PC meets the minimum system requirements for BlueStacks. Close other background applications to free up resources.
App Crashes: Update BlueStacks to the latest version or reinstall the emulator.
b. Camera Not Connecting
Verify that your camera is connected to the same network as your PC.
Ensure the camera’s firmware is up to date.
c. CMS Client Errors
Recheck the UID, username, and password entered during setup.
Restart your router and camera if connection issues persist.
d. No Video Feed
Check your firewall settings to ensure they are not blocking the CMS software or emulator.
Ensure your camera is online and functioning properly.
Advantages of Using Yoosee on a PC vs. Mobile
Feature PC Version Mobile Version
Display Size Larger, better for detailed viewing Smaller, portable
Control Interface Keyboard and mouse for precision Touchscreen, more intuitive
Multitasking Ability Easy to switch between tasks Limited to mobile apps
Storage Capacity Save large files directly to PC Limited by mobile storage
Power Source Continuous power supply Battery-dependent
Conclusion
Although the Yoosee app does not have a dedicated Windows version, using it on a PC through emulators or CMS software offers a powerful and versatile way to manage your smart security devices. The larger display, multitasking capabilities, and enhanced control make it a preferred option for many users. By following the steps outlined in this guide, you’ll be able to monitor your security feeds seamlessly, ensuring peace of mind whether you’re at home or at work.
Take advantage of the flexibility and convenience of Yoosee on Windows PC today and enhance your home or business security with ease.